
For a while I have been running a few websites using Virtualmin under CentOS. It’s a great free Web Hosting Control Panel application that helps you to manage your server without having to do it manually. It contains Apache, MySQL, proFTPD and much much more.
As I am a backup freak I have been backing up my server to Amazon S3 for a while. Amazon backups costs around $0.03 per GB, not that bad, but a few months ago I switched to Google Cloud Storage which has a technology called Nearline costing only $0.01 per GB (yes, 1/3 of the price!). The only disadvantage comparing to S3 is that the files retrieval takes a few seconds instead of milliseconds, as I am not serving this file on websites, and I really don’t mind waiting a couple secs to have the download link ready.
Virtualmin has a built-in script to automatically backup all servers to Amazon, but if you want your backups sent to Google, you need to buy the Pro version of Virtualmin. To bypass this restriction I’ve created a script to have it done.
-
To start, we need to have Google’s terminal application gsutil installed on the server, to do so, follow the steps from https://cloud.google.com/storage/docs/gsutil_install.
To test if gsutil is installed and configured correctly, you can type
gsutil ls, and it should list all your buckets (where you backup files will be stored).[user@server]# gsutil ls gs://bucket-name -
Now we create the folder where our temporary backup files will be stored. Remember that for this to work you need to have enough free space to store all the backup files before sending them to our bucket. In my case, the temporary files will be in /home/backups/files, so type in the console
mkdir /home/backups/files -
The next step is to create a bash script to automatically upload all files to our bucket. I want to upload each backup to its own dated folder, and when done, it should delete the files from the server. Copy the following script as save it to
/home/backups/upload.sh -
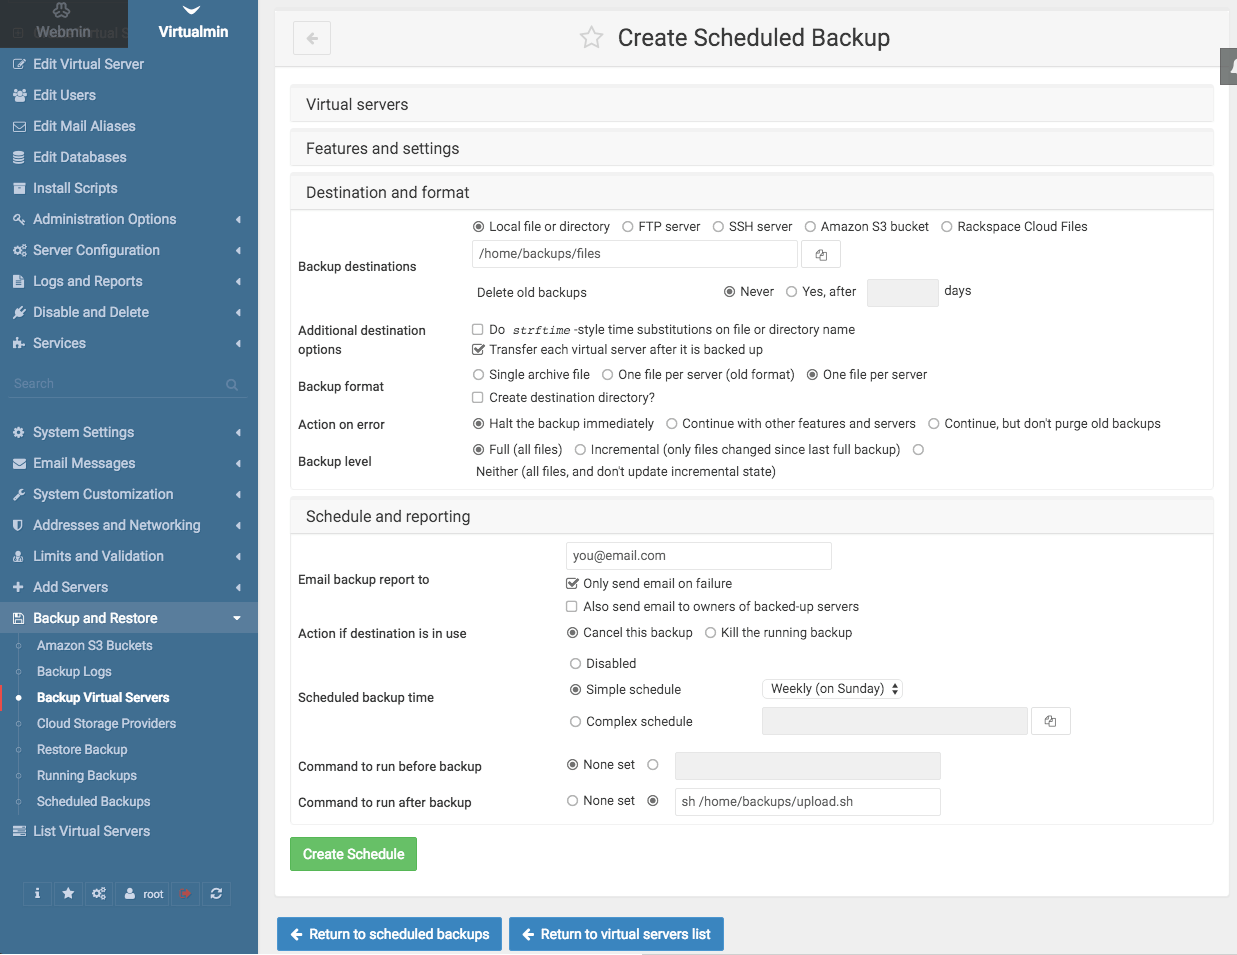
Everything is ready on the console part, it’s time to configure our scheduled backup in Virtualmin. Go to Backups and Restore » Scheduled Backups » Add a new backup schedule and fill as it show in the picture below (click to enlarge):

All set, you should have your backups ready to go!
I suggest you run it at least once to confirm everything is running smoothly.
Cheers!
Thanks Daniel 😉
I was hoping there was a way I could use Google Storage instead of Virtualmin’s default options.
I was able to set it up in minutes!
Thank you so much for the tutorial! It’s very useful.
Good Thinking! Great Work.
Any ideas how to restore backup from gcp buckets? (without manual download and upload)
something like “wget” files to local server ?