Apr 10, 2011

Dotklok + LM35 Temperature Sensor

I got my Dotklok up and running some days ago, I am really enjoying it on my room.
But I want to do more with it. Too bad right now I don’t have much time to play with electronics and build cool things.

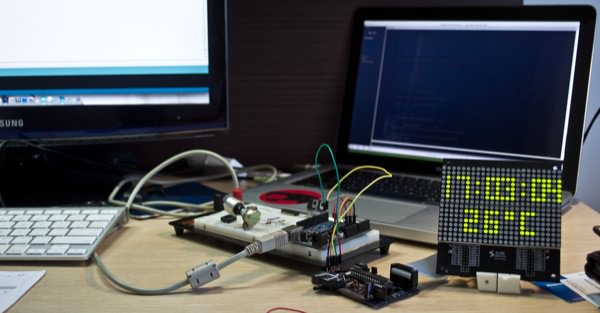
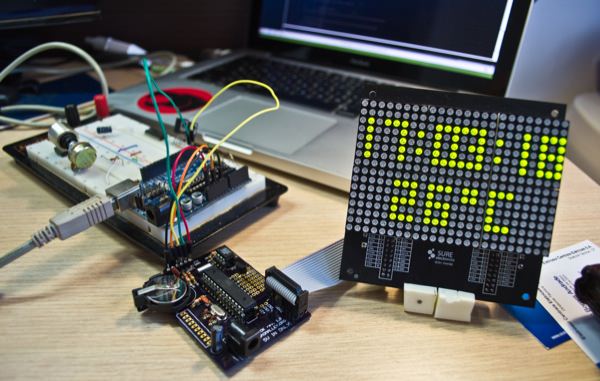
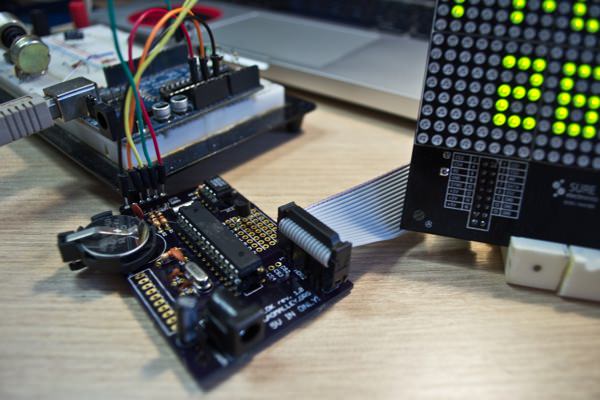
Anyway, today I decided to spend some time learning the Dotklok’s code and add a temperature sensor to it. The result was really cool, and now I am sharing the bit of code I added to the clock.

To make it work in your clock, you must add a new effect called temperature(); in the switch area, then in
time animations, add the code below. And for the hardware, I used a LM35 Temperature Sensor connected in 5V, GND, and AD3, but can use any AD available, just change the code afterwards.

Here is the code, but you can check the RAW file too.

// temperature()
// Temperature Sensor + Clock - by Daniel Spillere Andrade - www.DanielAndrade.net
// Should Change the Temperature Only when minutes change, to prevent floating on temperature
// Based on http://www.danielandrade.net/2008/07/05/temperature-sensor-arduino/ - Daniel Spillere Andrade - daniel [a] danielandrade.net
 
void temperature(){
 

  ht1632_clear();
 
  plot(0,0,1); plot(0,15,1); plot(23,15,1); plot(23,0,1);
 
  //Draw Dots and Temperature
 
  plot(7,3,1);
  plot(7,5,1);
  plot(16,3,1);
  plot(16,5,1);
 
  plot(13,9,1);
  plot(13,10,1);
  plot(14,9,1);
  plot(14,10,1);
 
  // Drawing the 'C', it's ugly I know :)
  for(int i=16;i<19;i++){  
    for(int j=9;j<14;j++){    
          if(j==9 || j==13) { plot (i,j,1);}
          else { plot(16,j,1); }    
    }
  }
 
  int temppin = 3; // Define LM35 PIN
  int tempval; // Temperature Read Variable
 
  tempval = ( 5.0 * analogRead(temppin) * 100.0) / 1024.0; //Makes the first read

  /* TIME LOOP */
  do{
   
    time_now = RTC.now();
     
    if( ( time_now.minute() != time_prev.minute() ) ){
    if( !power_up && midnight_random() )  return;
       
        tempval = 0;
        for(int i=0;i< =9;i++){
          tempval = tempval + (( 5.0 * analogRead(temppin) * 100.0) / 1024.0); // Reads the Variable and converts to Celsius
          delay(100);                                                           // tempf = (tempval * 9)/ 5 + 32; to converts to fahrenheit
        }
       tempval = tempval/10;
         
    }
      // Here starts the code. :)
      // Draw Temperature, only when minute changes!
       
      putchar_3x5(5,9,(tempval%100)/10);
      putchar_3x5(9,9,tempval%10);
     
      //Draw Time
      putchar_3x5(0,2,(time_now.hour()%100)/10);
      putchar_3x5(3,2,time_now.hour()%10);
      putchar_3x5(9,2,time_now.minute()/10);
      putchar_3x5(12,2,time_now.minute()%10);
      putchar_3x5(18,2,time_now.second()/10);
      putchar_3x5(21,2,time_now.second()%10);
     
      time_prev = time_now;

    /* CHECK BUTTONS, return if necessary */  
    if( change_animation() )  return;
   
    while( PAUSE && b5.isPressed( )); // pause mode for photos
           
  } while(1);
 
 
}

Some more pics and video.


What do you think?
If you modify the code, don’t forget to share!

Thanks for reading!

4 Comments

  • [...] hardware mod includes Daniel’s addition of a temperature sensor.  All the mods for DOTKLOK will be chronicled at the DOTKLOK Facebook [...]

  • Oi Daniel, vc ainda tem algum PCB dele sobrando pra vender?

  • @Igor tenho sim, entra em contato comigo por email. Valeu

  • Hi Daniel,
    The temperature sensor is a great addition to the Dotklock. I am very new to the Ardunio and although i have the new 1.5 code up and running i’m a little confused on where to install the code for this new hardware. Any help would be greatly appreciated.
    Regards,
    Kevin

Leave a comment